

前言
最近整理以前的一些笔记作为博客的文章,发现文章是写给别人看,笔记毕竟只给自己看,差别还蛮大的,很多内容需要重新调整完善…于是决定先去调整博客的样式好了(*´・д・)?
一直觉得邦多利的 Live2D 模型数量多,动作和表情丰富,比较精致,最近突发奇想,能不能用它的模型来当博客的看板娘,应该挺合适的,于是在网上搜索了一些资料确认可行性,于是有了本文
下载模型
模型来源
受益于邦邦强大的第三方辅助工具,在 bestdori 上很方便就可以获取到游戏里的角色模型,在 工具/Live2D浏览器 中根据卡牌、服装、季节服装来选择自己喜欢的模型

选择好模型后,查看模型的路径信息
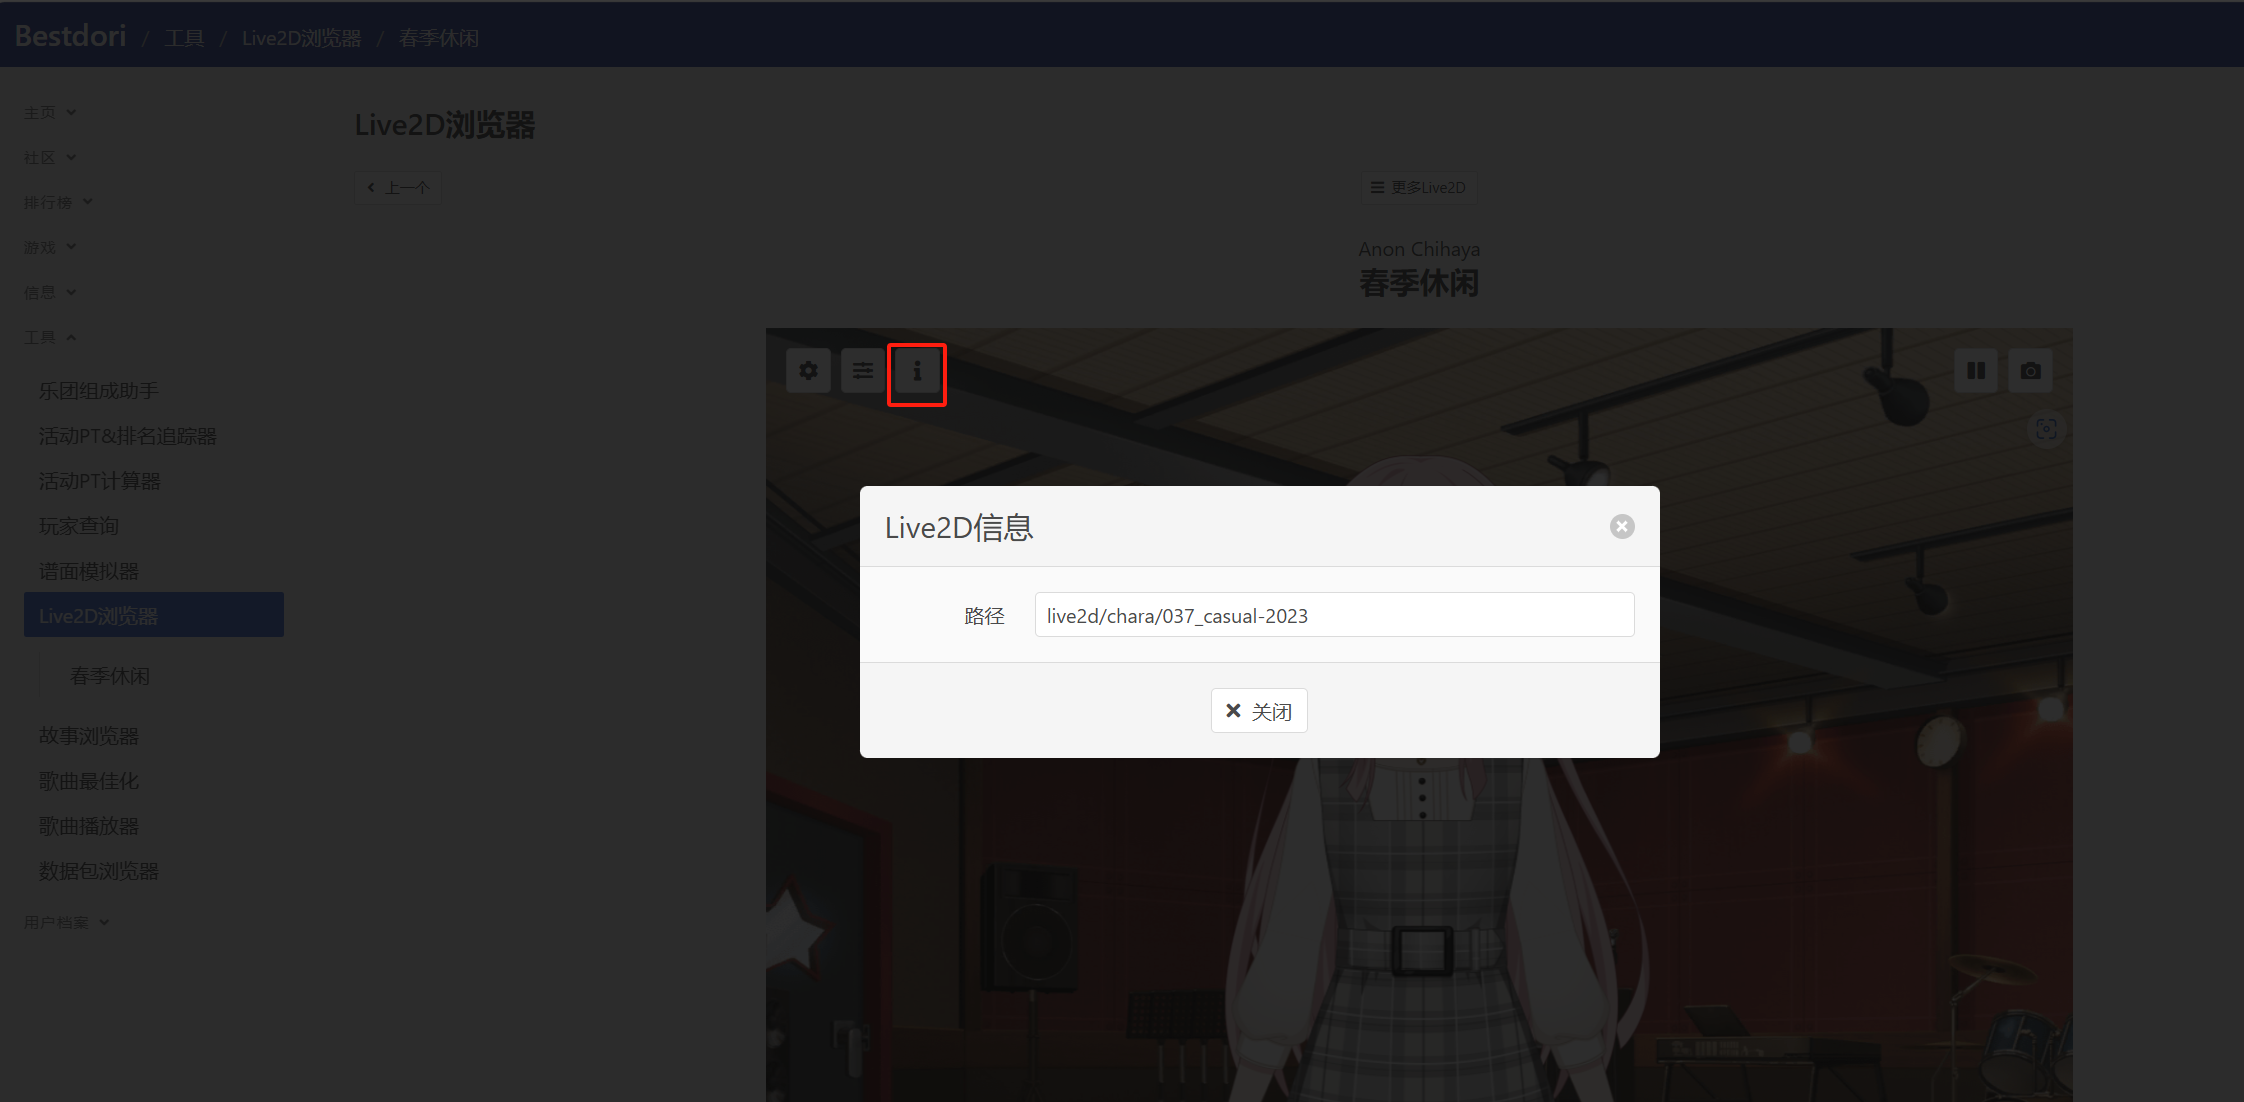
/live2d/chara 里面包含 BangDream 游戏里所有模型文件
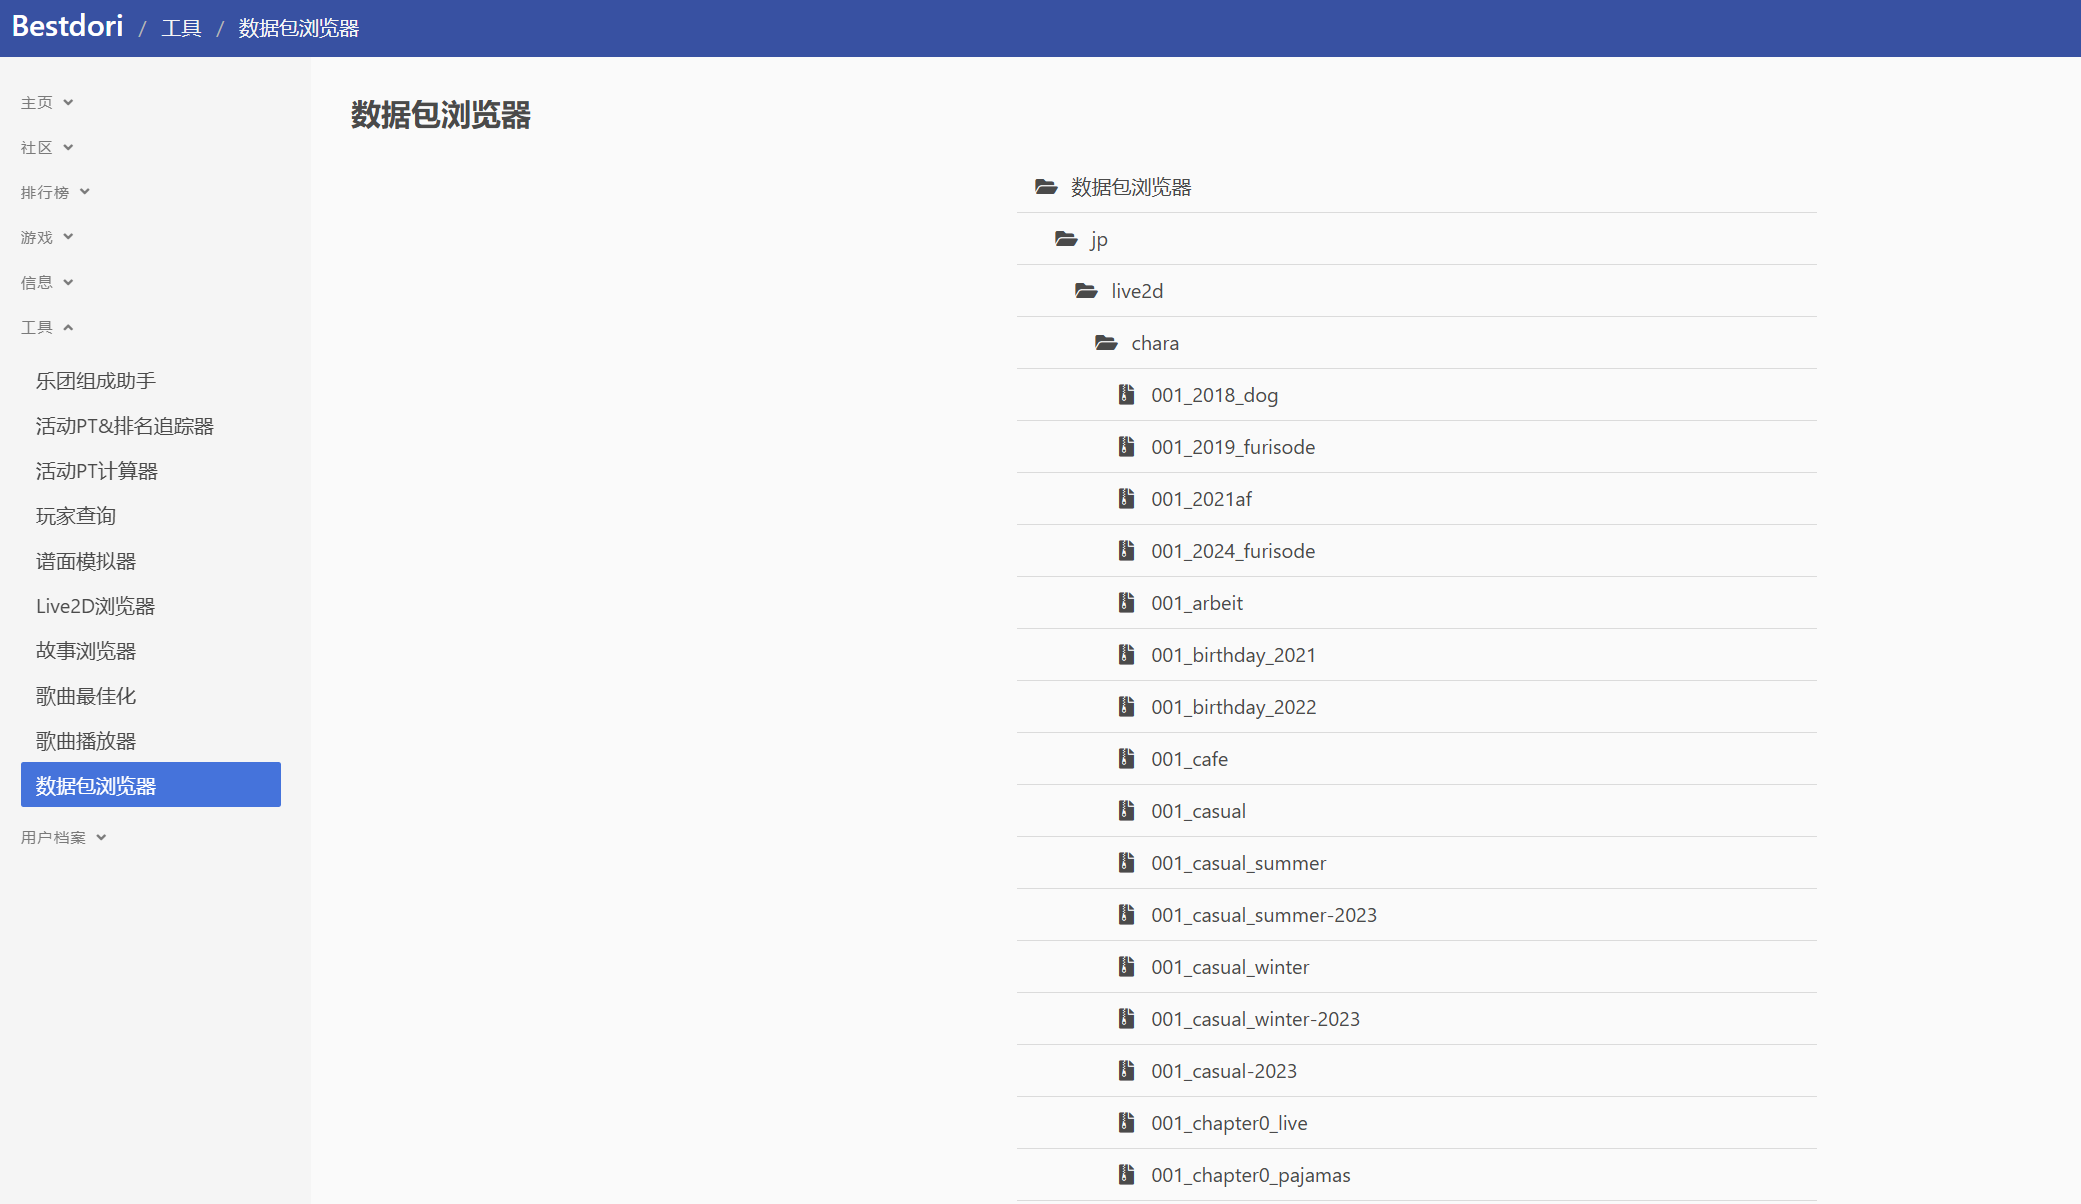
在 工具/数据包浏览器 中的 jp 文件夹(jp 是日服,也有其他国家,一般看日服就行)找到对应目录文件
- 037_casual-2023 其中 037 是角色代号,每个角色都有唯一的代号
- casual-2023 是服装的名字
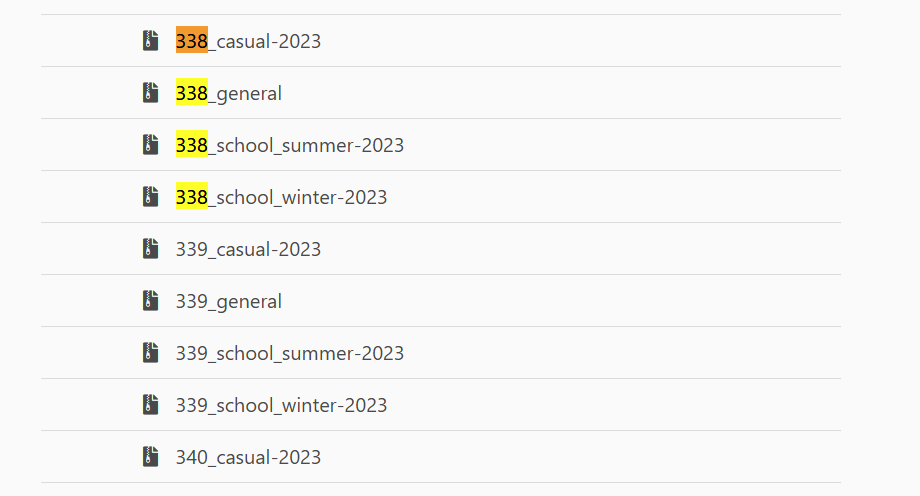
因为我想使用若叶睦的模型,目前游戏里 Ave Mujika 还没有上线,所以在 Live2D 浏览器里找不到对应模型,但还是可以通过代号在 /jp/live2d/chara 目录中找到目前日服现有的基础模型,睦的代号是 338,使用 Ctrl + F 进行搜索
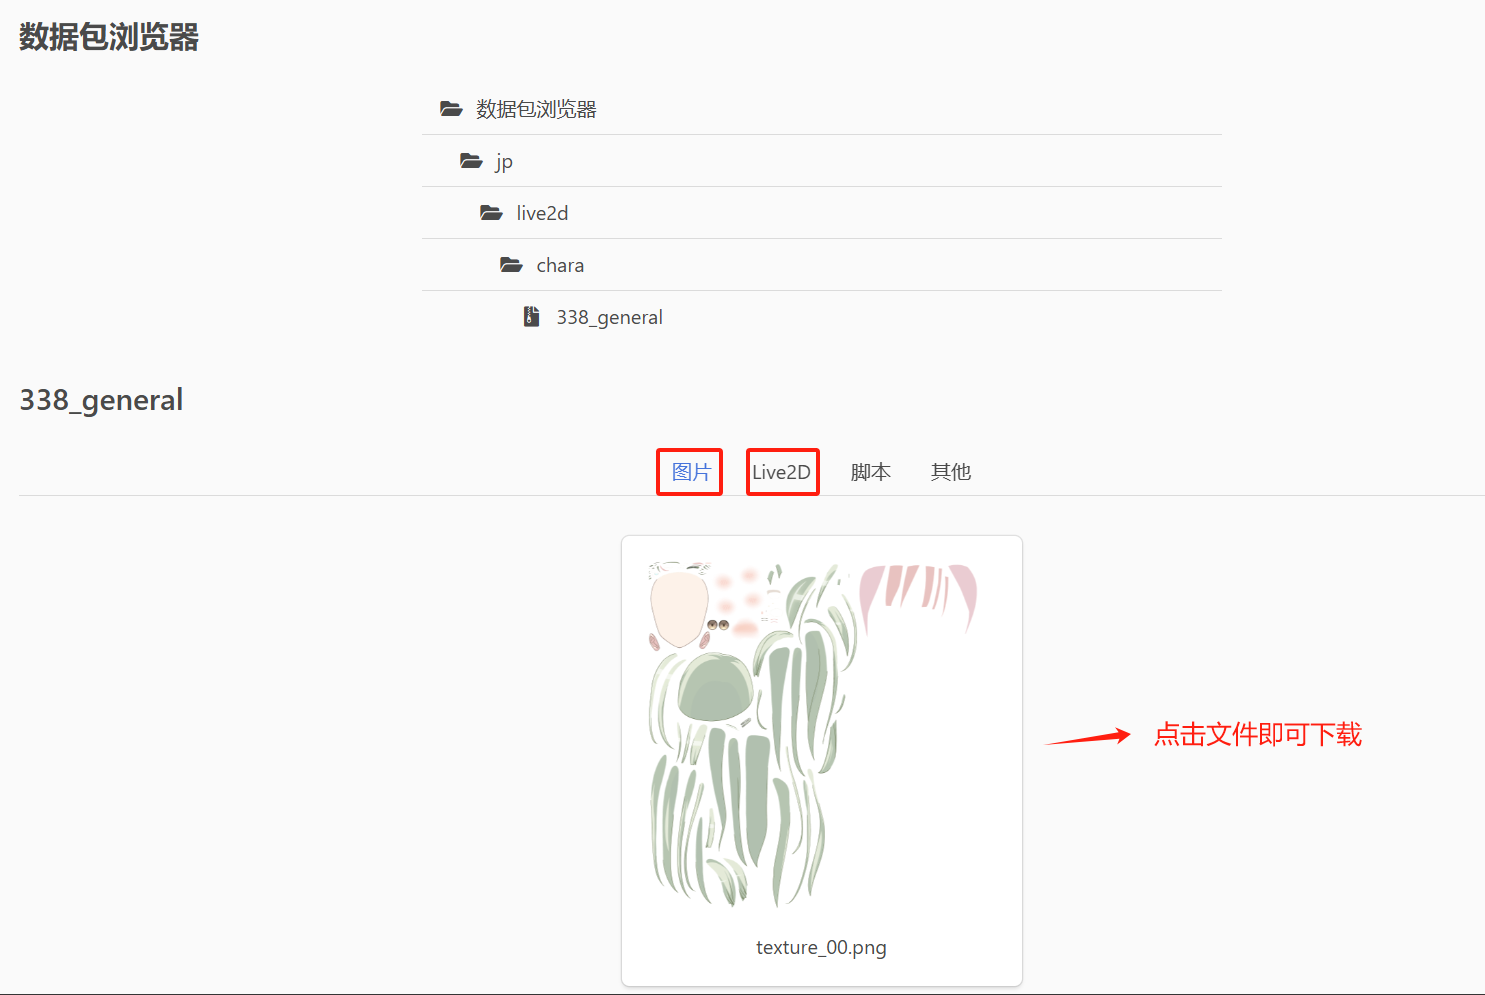
338_general 是一些通用的表情动作文件,我们需要把它的图片和 Live2D 文件下载下来,Live2D 里的文件比较多
- texture_01.png
- *.mtn
- *.exp.json
这里我选择 casual-2023 这个服装,同样进入这个文件,把里面的图片和 Live2D 里的文件下载下来
- texture_01.png
- mutsumi_casual-2023.moc
- mutsumi_casual-2023.physics.json
整理模型文件
把这些文件按照如下格式整理一下
- model/ - mutsmi/(模型名称) - expressions/(表情) - *.exp.json - model.1024/(1024是图片分辨率) - *.png - motions/(动作) - *.mtn - mutsumi_casual-2023.moc - mutsumi_casual-2023.physics.json使用模型
TIP
- live2d-widget 只支持 moc 模型
- 如果是 moc3 模型,建议使用 oh-my-live2d
- 本文的模型文件目录格式和内容只在 live2d-widget 上正常使用,不一定符合 oh-my-live2d 的模型文件要求
尝试过使用 oh-my-live2d 把模型引入,但博客基于 Astro 搭建,使用过程中或多或少存在一点问题,作者从去年开源后就没怎么更新过代码,文档写得还行,使用方式也比较现代化
最终选择使用 live2d-widget 引入模型,主要是因为它在 Astro 项目中使用起来没有什么问题,而且源码简单易懂,可定制性和扩展性比较强
官方文档的内容比较少,建议配合网上其他文章教程去使用,我这里参考了 【Hugo】Live2d-widget 给博客引入萌萌的看板娘 这篇文章,为了方便本地调试,使用 cdnPath 从本地引入模型,这种方式默认不支持换装,但自己实现一下切换服装也不难,或者可以按照文档里的 live2d_api 使用 apiPath 支持的功能更多,需要后端支持
下面就以 Astro + live2d-widget 为例说明如何使用模型,其他博客使用的框架其实也大同小异
ExtendAstro
使用孤岛架构(Islands Architecture)默认零 JavaScript 输出,采用 MPA(多页面应用),类似传统 JSP 那样通过服务器渲染,返回整个 Html 页面,非常适合用来搭建纯静态 SSG 站点
顺带一提,Qwik 框架通过在服务器端渲染时把 JavaScript 序列化加载到 Html 中实现零水合,Astro 框架本身支持使用多种前端框架开发组件,使用 Astro + Qwik 进行开发,应该是目前性能最强的前端开发方式,Astro and Qwik - a match made in performance heaven! - DevWorld 2024,国外已经有大佬实践 @qwikdev/astro
前端疯狂卷框架,一种框架还没用熟悉,又有新的框架冒出来😓
调整模型文件
一般的 Live2D 模型里就有 model.json 文件,但邦多利的模型没有这个文件,需要在 mutsmi 目录下创建 index.json 文件(index 是 live2d-widget 的格式要求)
model.json 文件一般是通过软件自动生成,而且 Cubism 2 有点旧了,相关文档不好找,通过查看 live2d.min.js 的源码,大概能知道 json 文件还支持哪些属性,但作用需要看代码猜测,也能从网上找到点零星的资料,比如 为博客添加 Live2D 看板娘 这篇文章中有提到
- hit_areas_custom 是可点击区域,head_x 和 body_x 是从左上角坐标,head_y 和 body_y 是右下角坐标
- 获取坐标的方式可以通过修改 live2d.min.js 中 DEBUG_LOG:!0 实现
内置支持的 Motion 字段有:
- flick_head:点击脑袋触发
- tap_body:点击身体触发
- sleepy:50000 毫秒后自动播放,index.json 没配置的话,会报错
其实 Motion 字段还有
- idle:空闲动作
实测 sleepy 没配置并不会报错
{ "version": "2.0.0", "id": "mutsumi_casual-2023", "model": "mutsumi_casual-2023.moc", "textures": [ "model.1024/texture_00.png", "model.1024/texture_01.png" ], "physics": "mutsumi_casual-2023.physics.json", "layout": { "center_x": 0, "center_y": 0.1, "width": 2 }, "hit_areas_custom": { "head_x": [-0.09, 0.95], "head_y": [0.5, 0.2], "body_x": [-0.3, 0.05], "body_y": [0.7, -1.3] }, "expressions": [ {"file":"expressions/default.exp.json"}, {"file":"expressions/idle01.exp.json"}, {"file":"expressions/sad01.exp.json"}, {"file":"expressions/smile01.exp.json"}, {"file":"expressions/smile02.exp.json"}, {"file":"expressions/smile04.exp.json"}, {"file":"expressions/angry01.exp.json"}, {"file":"expressions/surprised01.exp.json"} ], "motions": { "idle": [ {"file":"motions/idle01.mtn", "fade_in": 500, "fade_out": 500} ], "flick_head": [ {"file":"motions/thinking01.mtn"}, {"file":"motions/surprised01.mtn"}, {"file":"motions/sad01.mtn"}, {"file":"motions/sad02.mtn"}, {"file":"motions/smile01.mtn"}, {"file":"motions/smile02.mtn"}, {"file":"motions/smile04.mtn"}, {"file":"motions/angry01.mtn"} ], "tap_body": [ {"file":"motions/odoodo01.mtn"}, {"file":"motions/surprised01.mtn"}, {"file":"motions/kime01.mtn"}, {"file":"motions/bye01.mtn"}, {"file":"motions/nf01.mtn"}, {"file":"motions/nf02.mtn"}, {"file":"motions/nf03.mtn"}, {"file":"motions/nf04.mtn"}, {"file":"motions/nf05.mtn"}, {"file":"motions/nnf01.mtn"}, {"file":"motions/nnf02.mtn"}, {"file":"motions/nnf03.mtn"}, {"file":"motions/nnf04.mtn"}, {"file":"motions/nnf05.mtn"}, {"file":"motions/nf_left01.mtn"}, {"file":"motions/nf_right01.mtn"}, {"file":"motions/nnf_left01.mtn"}, {"file":"motions/nnf_right01.mtn"} ] }}在和 model 目录的同级目录下创建 model_list.json 文件,用来记录模型,目前只有一个模型(注意:是和 model 目录同级,不是在 model 目录里面)
{ "models": [ ["mutsmi"] ], "messages": [ ["..."] ]}本地引入模型
在 github 上 live2d-widget 项目的 dist 目录下找到以下文件,然后下载下来,其实 live2d.min.js 和 waifu-tips.js 我也本地引入了,但为了教程方便,就没有展示(直接在 github 上的 dist 目录下载 waifu-tips.js 可能会有 bug)
- autoload.js
- waifu-tips.json
- waifu.css
按照以下结构把文件放到静态资源的目录下,这里以 public 目录为例
- public/ - mulive2d-widget/ - autoload.js - waifu-tips.json - waifu.css - model/ - mutsmi/ - expressions/ - *.exp.json - model.1024/ - *.png - motions/ - *.mtn - mutsumi_casual-2023.moc - mutsumi_casual-2023.physics.json - index.json - model_list.json修改一下 autoload.js 的资源路径,如果想本地引入 live2d.min.js 和 waifu-tips.js,把 live2d_path 改成它们所在目录路径就好
// live2d_path 参数建议使用绝对路径const live2d_path = "https://fastly.jsdelivr.net/gh/stevenjoezhang/live2d-widget@latest/";// 资源路径const static_path = "public/live2d-widget/";
// 封装异步加载资源的方法function loadExternalResource(url, type) { return new Promise((resolve, reject) => { let tag;
if (type === "css") { tag = document.createElement("link"); tag.rel = "stylesheet"; tag.href = url; } else if (type === "js") { tag = document.createElement("script"); tag.src = url; } if (tag) { tag.onload = () => resolve(url); tag.onerror = () => reject(url); document.head.appendChild(tag); } });}
// 加载 waifu.css live2d.min.js waifu-tips.jsif (screen.width >= 768) { // 避免切换页面重复加载 window.onload = () => { Promise.all([ loadExternalResource(static_path + "waifu.css", "css"), loadExternalResource(live2d_path + "live2d.min.js", "js"), loadExternalResource(live2d_path + "waifu-tips.js", "js") ]).then(() => { // 配置选项的具体用法见 README.md initWidget({ waifuPath: static_path + "waifu-tips.json", //apiPath: "https://live2d.fghrsh.net/api/", // model_list.json的路径,model目录和它同级 cdnPath: "/public", tools: ["hitokoto", "asteroids", "switch-model", "switch-texture", "photo", "info", "quit"] }); }); }}在页面中引入脚本即可,这样在本地就能看到模型正常引入,但一般项目构建后会把 public 的内容直接输出到 dist 根目录,在开发中直接使用 / 根路径会找不到资源
<script src="public/live2d-widget/autoload.js"></script>处理 public 路径
通过在 tsconfig.json 的 compilerOptions 中添加 @public 变量处理这个问题
{ "compilerOptions": { "paths": { "@public/*": ["public/*"] } }, "include": ["src/**/*", "public/live2d-widget/*"]}在 autoload.js 中使用 loadExternalResource 方法请求 css 资源,在切换页面时会有问题,需要修改一下资源引入的方式
// live2d_path 参数建议使用绝对路径const live2d_path = "https://fastly.jsdelivr.net/gh/stevenjoezhang/live2d-widget@latest/";// 修改为根目录资源路径const static_path = "/live2d-widget/";
// 封装异步加载资源的方法function loadExternalResource(url, type) { return new Promise((resolve, reject) => { let tag;
if (type === "css") { tag = document.createElement("link"); tag.rel = "stylesheet"; tag.href = url; } else if (type === "js") { tag = document.createElement("script"); tag.src = url; } if (tag) { tag.onload = () => resolve(url); tag.onerror = () => reject(url); document.head.appendChild(tag); } });}
// 加载 waifu.css live2d.min.js waifu-tips.jsif (screen.width >= 768) { // 避免切换页面重复加载 window.onload = () => { Promise.all([ // loadExternalResource(static_path + "waifu.css", "css"), loadExternalResource(live2d_path + "live2d.min.js", "js"), loadExternalResource(live2d_path + "waifu-tips.js", "js") ]).then(() => { // 配置选项的具体用法见 README.md initWidget({ waifuPath: static_path + "waifu-tips.json", //apiPath: "https://live2d.fghrsh.net/api/", // model_list.json所在的路径,在根目录下 cdnPath: "/", tools: ["hitokoto", "asteroids", "switch-model", "switch-texture", "photo", "info", "quit"] }); }); }}在 components 文件夹中新建 Live2D.astro 文件
---
import "@public/live2d-widget/waifu.css";---
<script src="@public/live2d-widget/autoload.js"></script>最后在页面中使用组件即可
<Live2D></Live2D>自定义
一般来说,修改 waifu.cs 和 waifu-tips.json 能满足大部分需求
- waifu.css 样式都在这里修改
- waifu-tips.json 配置各种监听事件触发的提示语,可以根据 css 选择器选择 DOM 节点
提示语对若叶睦来说很简单,暂时都改成 “...” 就可以了_(:3 」∠ )_,有空再把她无双剑姬语录补充进去
如果还有更多自定义的需求,并且有点前端基础想尝试自己扩展功能,可以继续往下看
按照官方文档,把 live2d-widget 项目 clone 下来进行修改,再 build,从 dist 目录中获取文件,但需要注意的是,目前项目有几个 bug,我们需要修复一下才能使用
bug 修复
在 【Hugo】Live2d-widget 给博客引入萌萌的看板娘 这篇文章中有提到
如果你 model_list.json 中的 live2d 模型分组 只有一组的时候,会存在 bug,导致加载不出模型,需要进行修复
文章是通过直接修改 live2d.min.js 文件的源码修复这个 bug,而且还在源码中实现了切换服装的功能(替换模型 json 里的 texture 图片),不过不建议这么做,我们可以把 live2d-widget 项目 clone 下来,修改 src/index.ts 文件,把 initModel 方法里的 modelId 和 modelTexturesId 变量改为 0
(function initModel() {let modelId: number | null = Number(localStorage.getItem('modelId'));let modelTexturesId: number | null = Number( localStorage.getItem('modelTexturesId'),);if (modelId === null) { // 首次访问加载 指定模型 的 指定材质 modelId = 0; // 模型 ID modelTexturesId = 0; // 材质 ID}void model.loadModel(modelId, modelTexturesId, '...');fetch(config.waifuPath) .then((response) => response.json()) .then(registerEventListener);})();然后运行 npm install 和 npm run build 构建项目,但构建出来的 waifu-tips.js 没有引入 initWidget 函数,直接使用会报 initWidget is not defined ,需要把 rollup.config.js 文件中第37行的 input 修改为 ‘build/waifu-tips.js’
export default { input: 'build/waifu-tips.js', output: { name: 'live2d_widget', file: 'dist/waifu-tips.js', format: 'iife', }, plugins: [ nodeResolve(), string({ include: '**/*.svg', }), terser(), ], context: 'this',};但是发现模型还是加载不了,查看控制台发现一个 /get/?id=0-0 请求的报错,这是因为在 src/model.ts 文件中 loadModel 方法里的判断有问题导致的,第一次加载模型 this.modelList 为空,就会使用 apiPath 的方式请求后端获取模型,应该是项目之前用 TypeScript 重构导致的失误,我们修改这个判断,然后再重新构建项目,从 dist 目录下拿到 waifu-tips.js 和 live2d.min.js 文件从本地引入
async loadModel(modelId: number, modelTexturesId: number, message: string) { localStorage.setItem('modelId', modelId.toString()); localStorage.setItem('modelTexturesId', modelTexturesId.toString()); showMessage(message, 4000, 10); if (this.useCDN) { if (!this.modelList) await this.loadModelList(); if (this.modelList) { const target = randomSelection(this.modelList.models[modelId]); loadlive2d('live2d', `${this.cdnPath}model/${target}/index.json`); } } else { loadlive2d( 'live2d', `${this.apiPath}get/?id=${modelId}-${modelTexturesId}`, ); console.log(`Live2D Model ${modelId}-${modelTexturesId} Loaded`); } }切换服装
邦多利不同的服装其实是不同的模型,比如 338_school_winter-2023 中,Live2D 里也有单独的 mutsumi_school_winter-2023.moc 和 mutsumi_school_winter-2023.physics.json 文件
在 model_list.json 文件中 models 是一个二维数组,可以把相同角色不同服装当作一组模型,因为表情和动作等文件都是通用的,所以我把不同服装都放到相同角色目录下,把每个服装都当作一个模型,分别在它们的目录下创建一个 index.json 文件,修改里面对应的文件引用路径,注意 "textures" 第一个是 338_general 的 texture_00.png,第二个改成当前服装的 texture_01.png 路径
{ "models": [ ["mutsmi/casual-2023", "mutsmi/school_winter-2023", "mutsmi/school_summer-2023"], ["anon"] ], "messages": [ ["...", "...", "..."], ["hello"] ]}在 live2d-widget 项目 src/model.ts 文件里新增切换服装的逻辑
- 替换 loadModel 的 randomSelection 随机选择模型方法,自己实现按顺序选择模型
- 实现切换服装的方法,然后把它用在工具栏按钮的回调方法中
interface ModelClothesList { [key: number]: any;}
class Model { private modelClothesList: ModelClothesList = {};
async loadModel(modelId: number, modelTexturesId: number, message: string) { localStorage.setItem('modelId', modelId.toString()); localStorage.setItem('modelTexturesId', modelTexturesId.toString()); showMessage(message, 4000, 10);
if (this.useCDN) { if (!this.modelList) await this.loadModelList(); if (this.modelList) { // 把原本随机选择模型,替换成按顺序选择 // const target = randomSelection(this.modelList.models[modelId]); const target = await this.indexSelection(modelId, this.modelList.models[modelId]); loadlive2d('live2d', `${this.cdnPath}/${target}/model.json`); } } else { loadlive2d( 'live2d', `${this.apiPath}get/?id=${modelId}-${modelTexturesId}`, ); console.log(`Live2D Model ${modelId}-${modelTexturesId} Loaded`); } }
async indexSelection(modelId: number, array: any) { let indexId = this.modelClothesList[modelId]; if (indexId !== undefined) { indexId = ++indexId >= array.length ? 0 : indexId; } else { indexId = 0; }
this.modelClothesList = {}; this.modelClothesList[modelId] = indexId;
return array[indexId]; }
async loadModelClothes() { const modelId = localStorage.getItem('modelId'); if (this.useCDN && modelId !== undefined) { if (!this.modelList) await this.loadModelList(); if (this.modelList) { const index = Number(modelId); void this.loadModel(index, 0, this.modelList.messages[index]); } } }}model.ts 中本身已经有实现切换模型的逻辑,调用 loadOtherModel 这个方法就可以了,但需要注意它的判断逻辑依然有之前的 bug,只会调用 apiPath,按照之前的方式修改一下判断逻辑就可以使用了
最后
最终实现的效果还是相当不错的,睦头真可爱(=´ω`=)
在本地调试完,就可以把模型和 live2d-widget 文件放到到 CDN 加速访问,网上还有很多好看的 Live2D 模型,有些游戏里的模型也有不少网友解包分享出来,可以自行去查找,如果是 moc 类型的模型,使用 live2d-widget 引入都可以参考本文的模型文件目录和内容
PS:写文章真的好累